Windows...Let the Light Shine In!
- JG
- Sep 21, 2022
- 3 min read

The last two big cuts in the van after the roof A/C, roof fan and flares were the two windows.

We chose the CR Laurence T Vent Window (FW293L and FW293R) after-market windows to install on the driver and passenger side behind the front seats. We did not choose factory windows for the van because we wanted windows that could open with a vent or slide, and factory van windows from Ford do not have that option.

Ordering windows was one of the longest lead times of our build so far, with a wait of nearly 7 months from the time we ordered to the time we received both windows (they shipped separately, and we received them about a month apart).
After cutting out the holes for the flares, cutting holes for the windows was relatively easy at this point. It was getting them fitted and making sure they don't leak that was where the real work was.
Here are some of our learnings from the installation:
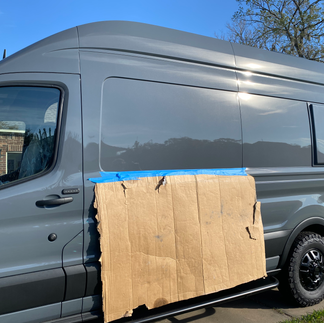
Fine tooth fine sheet metal jig saw blades worked well to make the cut, and Ryan replaced after each cut. He made his cuts from the inside except around the door locks on the passenger side. For this, we used a piece of foam to avoid cutting the door lock when cutting from outside in (nifty little trick we saw someone else do in their YouTube video installation)! We used duct tape to prevent the metal cutout from dropping and scratching the van and to reduce vibration when making the cut. We also used cardboard on the outside and plastic film/cardboard inside to minimize amount of metal shavings contacting the paint.
There is not a lot of margin for error if you mess up this cut. It is less forgiving than the cut for the Flarespace Flares for example. So, we took our time and thought through this one before we jumped into cutting!
We started with the window behind the driver's side seat. Since the window cutout was framed and Ryan did not think the tolerance would be an issue, he used the included trim ring to verify the cut outline within the cutout in the van for the driver side (you can see that in the video). We ended up with upper forward corner being ever slightly too large and had a very small leak upon leak testing. I had 3/4" x 1/8" butyl tape on hand that solved the issue. 1/2" x 1/8" would have been ideal but 3/4" works (just some tape outside of the window margin but not visible). Butyl tape can be your friend!

For the passenger side, we traced the window onto cardboard and used the cardboard template to mark the lines on the passenger sliding door (also in the video). In my opinion, this was the better route and very important for the slider door, as the van window cutout is a bit different than the CR Laurence window (more so than the driver side). I ended up cutting this window slightly small but was able to remove a small amount of sheet metal with a Dremel grinding wheel quickly to level out the window.
Pay attention to how you tighten the window trim ring to pull in the window and compress the seal. It is possible to over torque the screw and strip the created threads in the aluminum window frame. I did end up adding one screw in the corner to pull in the window more on the driver side.
Windows (once installed) are very nice! We are very happy with how they look, and we love having the feature of a vent to be able to open on both sides to get a nice cross breeze when needed.

Finally, Leak test....leak test....leak test! This required me or Ryan standing on a ladder for about 20 minutes with a garden hose "watering" the van. We did find a few leaks that we were able to address and fix. It's better to find them now then later!


Comments